
Solar panels need sunlight to generate the electricity but as we all know our renewable light source sun is not always stable at one position, it rises from east and sets at west one horizon to another. So if we place our solar panel in any one direction they wont get the most of the light throughout the day. So in that scenario Sun light tracking system comes into role. This system faces the panels towards the incomming light source to get more out of it.
This is an example of how you can create for real time bigger solar panels but you need to implement with more heavy duty components for durability during winds.
So lets get started with looking at the required components for this project.
Table of Contents
Required Components:
- ESP8266 NodeMCU with MicroPython installed
- Light dependent resistors (LDR). X 2
- MG90S Servo – generic X 1
- 10k Resistor X2
- Connecting wires.
- 2 diodes for stable readings (1N4004 )
Schematic diagram
Connect the above components as shown in the below circuit diagram.
![]()
In the above circuit diagram we connected two LDR to the D1 and D2 pins along with diodes in series and other side of the LDRs are connected to one side of 10k Ohm resistors and other side of the resistor to ground GND.
Next connect the servo motor as power wire to the 5V supply of nodeMCU Vin, and blackwire to the Ground, and signal wire to the D5 digital pin.
Servo motor Setup:
To build the moving face we need to add a base plastic panel on servo motor and the rotating shaft of motor should be sticked to ground surface. for reference look at the below image. this setup works only for mini sized project.

Source Code:
Upload the code to the nodeMCU with MicroPython installed in it through uPycraft. If you dont know how to install refer the below tutorials.
Install MicroPython on ESP8266
Copy the code from below and paste it in the main.py file and upload it to board.
import time
import machine
ldr1 = machine.Pin(4, machine.Pin.OUT)
ldr2 = machine.Pin(5, machine.Pin.OUT)
ldr1val = 0
ldr2val = 0
direction = 40
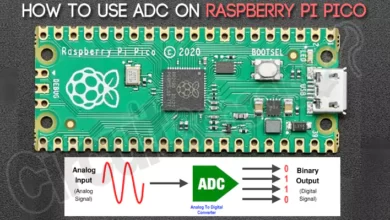
adc = machine.ADC(0)
servopin = machine.Pin(14)
servo = machine.PWM(servopin, freq=50)
ldr1.value(0)
ldr2.value(0)
servo.duty(direction)
#print(ldr1val, ldr2val)
while True:
ldr1.value(1)
ldr1val = adc.read()
#print(ldr1val)
ldr1.value(0)
time.sleep_ms(100)
ldr2.value(1)
ldr2val = adc.read()
#print(ldr2val)
ldr2.value(0)
time.sleep_ms(100)
ldrsum = (ldr1val - ldr2val)
#print(ldrsum)
if (ldrsum >= 99):
direction +=10
elif (ldrsum <= -99):
direction -=10
else:
direction +=0
# print("nothing to do")
if (direction < 40):
direction = 40
elif (direction > 120):
direction = 120
else:
directiont = direction
servo.duty(direction)
#print(direction)
#print("-------------------------")
time.sleep(2)
After uploading the code press reset button on the board, then to test weither it is working or not use a flash light and move over it. The motor will move according to the light when the light is faced towards the sensor.


Hello!
I know… this post is old, but just find it and inspired me for making a DYI solar tracker.
I just say that you can use only one 10k resistor, because if you use 2 of them for each LDR, they are in parralel connection with an equivalent resistor of 5k. I use only one in my build and it’s working fine.
Sorry for my bad english 🙂